Ai Art Workflow Guide: Must-Have, Effortless Steps
Read Time:14 Minute, 38 Second
Introduction
AI art has moved from novelty to essential creative tool. Many artists now blend traditional skills with machine-driven ideas. This ai art workflow guide explains must-have, effortless steps you can use right away.
You will learn how to plan, create, refine, and deliver AI-generated art. Moreover, this guide focuses on practical tips. Therefore, you can use it whether you are a beginner or a seasoned creator.
Why a Workflow Matters
A clear workflow saves time and prevents creative blocks. Without structure, you may repeat tasks or miss steps. Consequently, your projects can stall or feel inconsistent.
Conversely, a good workflow helps you scale. Additionally, it improves quality and makes client work predictable. Over time, you will refine your steps to match your style and tools.
Overview of the Workflow
This ai art workflow guide covers planning, tool selection, prompt design, image generation, editing, and delivery. Each section gives actionable steps and real tips. Also, I include a tool table to speed your setup.
Follow these steps in order. However, feel free to adapt them to your process. The goal is to make AI art creation smoother and more reliable.
Essential Mindset and Creative Groundwork
Start with a clear creative intention. Ask what you want the art to express. For example, decide on mood, color palette, and message. This clarity will guide prompts and editing choices.
Next, gather visual references. Pin images, textures, and color swatches. These references help you craft precise prompts. Additionally, they speed the review process by reducing guesswork.
Define project constraints early. Set deadlines, file sizes, and output formats. Also, determine your revision limits to prevent scope creep. With constraints, you will make choices quickly and stay on schedule.
Choosing the Right Tools
Selecting tools depends on your goals and budget. Free tools suit experimentation. Paid platforms offer higher resolution and advanced controls. Therefore, choose tools that match your needs.
Consider these categories: generative models, image editors, upscalers, and asset managers. Use a model for creation and an editor for polish. Then upscale or vectorize for final output.
Tool comparison table
| Purpose | Recommended Tools | Notes |
|———|——————-|——-|
|Text-to-image | Midjourney, Stable Diffusion, DALL·E 3 | Good starting models |
|Image editing | Photoshop, Affinity Photo, GIMP | For retouching and compositing |
|Upscaling | Topaz Gigapixel, ESRGAN, Real-ESRGAN | Preserve detail for prints |
|Vector conversion | Adobe Illustrator, Vectorizer.ai | Convert for logos and scalable art |
|Asset management | Notion, Google Drive, PureRef | Organize references and outputs |
Additionally, look for community plugins and scripts. These can automate repetitive tasks. For instance, batch processing and prompt templates save hours.
Setting Up Your Workspace
Create a dedicated folder structure for each project. Use clear names and dates. This system prevents lost files and confusion.
Organize smaller assets in subfolders. For example, save prompts, references, drafts, and finals separately. Also, version each major iteration to track progress.
Maintain a productivity tool for tasks and deadlines. Use a lightweight tool like Trello or Notion. Then assign milestones for prompt tests, revisions, and delivery.
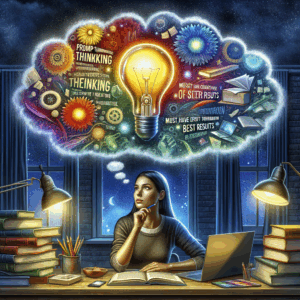
Building a Prompt Framework
A reliable prompt framework makes generation faster and more predictable. Start with a base structure: subject, style, color, lighting, and mood. Then add modifiers for details and quality.
Use short clauses to keep prompts readable. For example, “portrait of an elderly woman, oil painting, warm light, cracked texture.” This structure informs the model clearly.
Iterate prompts systematically. Change one variable per test. That method helps you learn how the model reacts. Also, save high-performing prompts for future projects.
Prompt Engineering Tips
Add clear style references to the prompt. Name artists or art movements when appropriate. However, be mindful of copyright and platform rules.
Use negative prompts to remove unwanted elements. For instance, specify “no text” or “no watermark.” Doing so cuts down on unnecessary retouching.
Control detail with quality modifiers like “high detail” or “ultra-realistic.” But avoid overloading the model. Too many modifiers can confuse the output.
Practical Prompt Examples
– “Surreal cityscape, neon reflections, rainy night, cinematic, by a modern impressionist.”
– “Minimal logo, geometric shapes, teal and coral palette, flat design, clean edges.”
– “Fantasy creature, dynamic pose, studio lighting, concept art, high detail.”
Lastly, annotate prompts with expected aspect ratios and resolutions. For instance, “16:9, 3000×1688.” That specification matters for layout and printing.
Optimization and Iteration Strategies
Run low-resolution tests first. This approach saves credits and time. Then upscale the best variant for final edits.
Use batch generation to explore variations. Generate ten versions, then pick the top two. Refine those with slightly altered prompts.
Apply systematic changes. Modify color, then test lighting. Next, alter composition. This method tells you what factors create the biggest improvements.
Controlling Composition and Framing
Specify camera angles or focal lengths to influence composition. Use terms like “wide shot,” “close-up,” or “bird’s-eye view.” Models respond well to photographic language.
Consider the rule of thirds and negative space. Mention where the subject should sit in the frame. For logos and icons, insist on centered composition.
Moreover, use guides during editing to tighten composition. Crop for balance and check edge details. Always preview prints and screens at intended sizes.
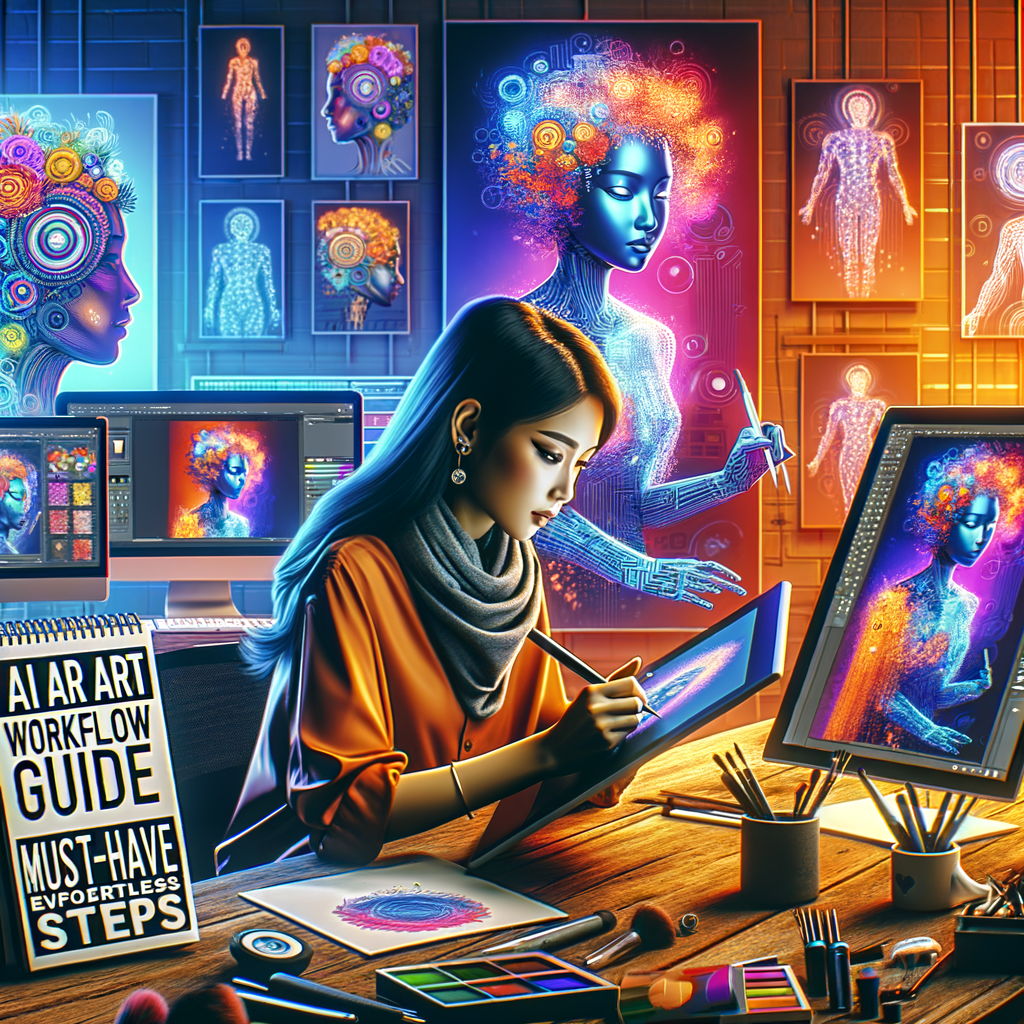
Refining Generated Images
Open the generated image in your editor of choice. First, remove obvious artifacts. Common issues include extra fingers, odd text, and mismatched limbs.
Next, improve color balance and contrast. Small adjustments often make images pop. Then, use healing and clone tools for cleanup.
Finally, composite multiple outputs if necessary. Layer different renders and mask the best parts. This hybrid approach yields stronger images than one-pass generation.
Advanced Editing Techniques
Apply frequency separation for high-end texture work. This technique separates color and detail layers. Therefore, you can edit texture without harming color.
Use dodge and burn to sculpt light and shadow. This process adds depth and focus. Also, apply selective sharpening on key details.
Consider color grading to unify the image. Use LUTs or manual curves for mood. Tone-matching ties AI-generated elements to real photography.
Upscaling and Preparing for Output
Upscale only after you select the final variant. Upscaling too early wastes processing power. Moreover, you should retain the original file for reference.
Choose an upscaler that matches your style needs. Some upscalers preserve texture. Others prioritize sharpness. Test a few to see which one suits your work.
Finally, convert and export in proper color profiles. Use sRGB for web and Adobe RGB or CMYK for print. Verify resolution and bleed for printed work.
Color Management Basics
Set your project color space at the start. Then keep it consistent across tools. Inconsistent color spaces lead to color shifts.
Calibrate your monitor for accuracy. Calibration tools remove guesswork and give you reliable previews. Also, soft-proof for print before final export.
When collaborating, embed color profiles in files. This step ensures other team members see correct colors. Likewise, specify color expectations in briefs to clients.
Metadata, Licensing, and Rights Management
Add metadata to your final files. Include author, license, and project tags. Metadata aids searchability and organization.
Understand model licensing and data usage policies. Some platforms restrict commercial use. Always check terms before selling or licensing art.
When in doubt, get written consent. Ask clients if they expect exclusivity or derivatives. Clear agreements prevent legal issues later.
Workflow Automation and Templates
Automate repetitive tasks to save time. Use scripts for batch renaming, resizing, and exporting. Many apps support actions or macros.
Create prompt templates for common styles. Then tweak them slightly for each project. Templates speed initial generation and keep quality steady.
Build a version control habit. Label files with iteration numbers and dates. This habit helps you backtrack and compare versions.
Collaboration and Project Management
Share visual references early with collaborators. Use cloud folders to keep assets synced. Also, use comments and timestamps to track feedback.
Clearly define roles in the team. Who curates prompts? Who edits images? Who handles client communication? Clear roles speed decisions.
Host regular check-ins for progress and approvals. Short, frequent reviews prevent late-stage surprises. Moreover, they build client trust.
Monetization Paths for AI Art
You can sell prints, digital files, or licensing rights. Additionally, offer custom commissions or brand work. Each path requires different deliverables and formats.
Consider stock marketplaces for passive income. Upload multiple styles and sizes. However, follow marketplace rules for AI-generated content.
Offer courses or templates if you have a strong process. Teaching your workflow can create recurring revenue. People pay for efficiency and knowledge.
Ethical Considerations and Best Practices
Acknowledge sources and inspirations. Transparency builds credibility and trust. Also, it shows respect for other creators.
Avoid tools or prompts that promote abusive content. Use your art to uplift and inform. Ethical choices protect your reputation long term.
Also, disclose AI involvement when required. Many platforms and clients want clarity. Honest disclosure prevents misunderstandings and legal risks.
Organizing Your Asset Library
Label assets with clear, searchable tags. Use consistent naming conventions. For example: projectname_version_date.ext.
Preserve unused generations in an archive. You might reuse elements later. Archiving helps you find inspiration and reuse ideas efficiently.
Use a light database for metadata and notes. Add prompts, settings, and model versions to each file. This record keeps your process repeatable and reliable.
Scaling Your Workflow for Agency Work
Standardize deliverables and templates for client projects. Create starter packs for common requests. These packs speed approvals.
Train team members on your prompt framework and tools. Shared standards improve quality and delivery time. Also, document best practices and common fixes.
Set up quality control checkpoints. Have a reviewer check technical issues, color, and composition. A final review reduces rework and client revisions.
Troubleshooting Common Issues
If images show awkward anatomy, change angle or rephrase prompts. Use references and specific anatomy terms to help models.
When colors look off, check color space and monitor calibration. Also, verify your prompts don’t conflict with style settings.
If you see text or logos in images, add negative prompts like “no text” or “no watermark.” Additionally, clean up stray elements during editing.
Legal and Copyright Practicalities
Copyright laws around AI art vary by country. Some jurisdictions allow full copyright. Others have limits. Consult legal advice for commercial use.
Avoid directly copying a living artist’s style for commercial projects. Instead, use broader stylistic references. You can still achieve a similar vibe ethically.
Keep records of prompts and source images. These records may help if legal questions arise. Documentation protects you and your clients.
Performance and Cost Management
Test models with small images to control cost. Then refine prompts to reduce wasted generations. This approach gives you a cost-efficient pipeline.
Monitor subscription usage and credits closely. Set alerts for limits and refunds. Also, negotiate volume pricing if you scale up.
Choose local or cloud processing based on budget. Local GPUs reduce long-term costs but require hardware. Cloud services offer flexibility and quick scaling.
Templates and Presets to Save Time
Save prompt presets for recurring styles. Create layered PSD or Affinity templates with editable masks. Then you can swap elements fast.
Use export presets for specific platforms. For example, create presets for Instagram, print, and websites. These presets reduce repetitive work.
Share a library of favorite brushes and LUTs. Reusable assets accelerate the final polish step. Also, they help maintain a consistent brand look.
Maintaining Creative Flow
Limit daily generation sessions to avoid burnout. Creativity thrives with breaks and limitations. Try the Pomodoro method or short sprints.
Keep a sketchbook or moodboard of new ideas. AI works best when you feed it refined concepts. Similarly, keep testing new models to stay inspired.
Accept imperfection during early stages. Rapid iteration beats perfect waiting. Then, refine the best outputs into polished final pieces.
Case Study: From Prompt to Print in Five Steps
1. Plan: Define mood, color, and printable size.
2. Generate: Run 20 small tests with controlled prompts.
3. Select: Pick top three variants and refine prompts.
4. Edit: Composite and clean up in an editor.
5. Finalize: Upscale, color-correct, and export with bleed.
This simple pipeline ensures predictable results for prints. Also, it scales to series and multi-panel works.
Accessibility and Inclusive Design
Design with clarity and contrast for accessibility. Ensure text overlays are readable. Also, provide alternative text for web images.
Consider cultural context and representation. Use references and sensitivity readers when necessary. Respect and inclusivity improve audience connection.
Offer different formats for users with limitations. For instance, provide high-contrast versions or descriptive captions.
Future-Proofing Your Workflow
Document your process as you refine it. Save successful prompts and settings. This documentation makes updates easier over time.
Keep an eye on model updates and legal shifts. New tools and policies can change best practices quickly. Therefore, adapt your workflow when needed.
Experiment regularly to expand your creative reach. Small experiments uncover new directions. They also prevent your work from becoming stale.
Checklist: Must-Have Steps Summary
– Define intent and constraints.
– Gather references and create a moodboard.
– Choose models and tools.
– Build and test prompts.
– Iterate via low-res tests.
– Edit and composite selected variants.
– Upscale and export with correct color profiles.
– Add metadata and licensing notes.
– Archive assets and document prompts.
– Maintain ethical transparency and client agreements.
Common Tool Sets (example stacks)
– Beginner: DALL·E 3 + Canva + Real-ESRGAN
– Professional: Stable Diffusion + Photoshop + Topaz Gigapixel
– Studio/Agency: Midjourney + Substance Painter + Adobe Suite + Custom scripts
FAQs (Frequently Asked Questions)
1. Can I sell AI-generated art commercially?
Yes, often you can. However, check the model’s license terms first. Some services restrict commercial use. Also, ensure you don’t infringe on other artists’ copyrighted styles.
2. Do I need coding skills to use AI art tools?
No, many tools work through simple web interfaces. Yet, coding helps automate repetitive tasks. Basic scripting can speed batch workflows.
3. How do I avoid generating copyrighted characters?
Avoid naming or closely describing protected characters. Use general descriptors and original combinations instead. If unsure, get a legal opinion.
4. Which model gives the most photorealistic results?
Results vary by version and settings. DALL·E 3 and newer Stable Diffusion checkpoints often produce great realism. Test multiple models to compare outcomes.
5. How do I remove unwanted text or artifacts?
Use negative prompts like “no text” at generation. Then clean remaining artifacts in an image editor. Healing and clone tools fix most issues.
6. What file formats should I deliver to clients?
For web: optimized PNG or JPEG in sRGB. For print: TIFF or high-quality JPEG with Adobe RGB or CMYK as requested. Also include layered files if edits are needed.
7. How do I credit AI in my work?
Follow platform and client requirements. Common practice: mention the model and tools used in metadata or captions. Transparency avoids misunderstandings.
8. Can I train a custom model on my art?
Yes, you can fine-tune models or train LoRAs and embeddings. However, you need data, compute, and technical knowledge. Services offer simplified training options.
9. How do I manage costs when producing many variants?
Run low-res tests, limit iterations, and batch process. Also, negotiate subscription tiers or use local hardware for heavy workloads.
10. What are the biggest pitfalls beginners face?
Overcomplicating prompts and skipping reference gathering. Also, ignoring color management and not saving iterations. Follow a simple workflow to avoid these mistakes.
Additional Questions You Might Have
1. How do I choose between cloud and local model hosting?
2. Can AI-generated art be trademarked?
3. How do I prevent style drift across a series?
4. What ethical disclosure language should I use for clients?
5. How do I price AI-assisted commissions compared to traditional art?
6. Can I use copyrighted photos as references?
7. How do I handle client revisions when using AI?
8. What are the best practices for multi-language prompts?
9. How do I ensure color accuracy when printing across vendors?
10. How do I back up large libraries of generated images?
Answers to Additional Questions
1. Cloud vs local hosting depends on budget and control. Cloud offers ease and scaling. Local offers privacy and lower long-term costs. Consider hardware needs and security requirements.
2. You can trademark designs if they meet distinctiveness standards. Consult an IP attorney. AI involvement does not automatically prevent trademark filings.
3. Prevent style drift with strict prompt templates and color palettes. Use consistent LUTs, brushes, and compositing rules across the series.
4. Use a short statement: “This artwork was created using [model/tool]. Final edits were done in [software].” Tailor it to client needs and legal advice.
5. Price based on time, uniqueness, rights, and deliverables. Include time for prompt testing, editing, and upscaling. Offer tiered pricing for exclusive rights and commercial licenses.
6. Using copyrighted photos as direct training data or public distribution may cause legal issues. Use photos you own or have permission to use.
7. Set revision rounds in your contract. Use clear change requests and a small fee for extra rounds. Keep original prompts and versions organized.
8. For non-English prompts, test translations because nuance matters. Some models respond better in English. Use bilingual testing to get optimal results.
9. For print consistency, proof with the vendor using a test print. Ask for ICC profiles and soft-proof in your editor. Adjust and re-proof until satisfied.
10. Use redundant backups: local NAS, cloud storage, and offsite backup. Use consistent naming and metadata to ease retrieval.
References
– Midjourney: https://www.midjourney.com
– Stable Diffusion (Stability AI): https://stability.ai
– DALL·E 3 (OpenAI): https://openai.com/dall-e-3
– Topaz Gigapixel: https://www.topaz (Incomplete: max_output_tokens)
Happy
0 %
Sad
0 %
Excited
0 %
Sleepy
0 %
Angry
0 %
Surprise
0 %